build your own electric motor kit
 Do you want to build an electric motor? You could probably find just about everything you need for a simple one around your house. Let me show you how to build it and why it works.
Start With Magnet Wire
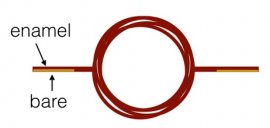
OK, this is something you may need to buy. Magnet wire looks like plain copper wire, but has an enamel coating. This means that you can wrap it in a coil and the sides of one wire won't create a conducting short path to the next wire. Instead, the current will travel in a loop. If you can't find any around the house, I suggest RadioShack or the hardware store. Make sure you get wire thick enough that you can bend it so it maintains its shape.
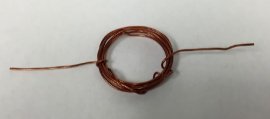
The first step is to wrap the magnet wire around a circular object to make a coil. I used a D-cell battery. Leave the ends sticking out of the circle, like this.
 Why wrap it in a circular loop? The main idea is that an electric current makes a magnetic field. You can increase the strength of this magnetic field by increasing the current or by making multiple loops. Since we want a simple motor, more loops is the way to go. How many? It doesn't really matter. Try five to 10 loops.
Switching the Current
This loop will be the main spinning part of the electric motor. However, to get this spinning with a single magnet we need to change the direction of the electric current. Actually, our design will simply turn the current on and off instead of changing the direction. We are going to do this by shaving off part of the enamel insulation on the wire.
 Take something sharp—like the edge of scissors or a utility blade—and use it to scrape the enamel off one half of the wire coming out of your loop.
When this loop sits on a metal conductor, current will flow through the loop. When the loop rolls over (so it's upside down) it will sit on top of the enamel and there will no longer be a current.
Putting It on a Holder
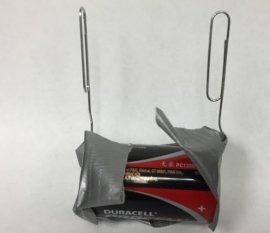
Since we want this loop to spin, we must support it. I used two paper clips to form a bracket for the arms of this loop. Be careful though. Sometimes you get plastic-coated paperclips. Those won't work because the plastic will act as an insulator. Make sure you use ordinary paper clips. Bend one of end of each paperclip so it sticks out straight, then tape the two paperclips to a D-cell battery (a C-cell should work fine too).
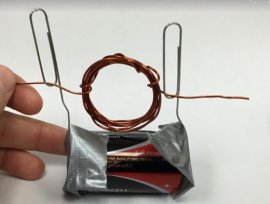 Now you are ready to start assembling everything. Slide the loop of wire through the paperclips so the two paperclips support it.
You might need to bend the wire a bit. Make sure the loop can spin freely. It's OK if it tends to flip to one side, but if it's too unbalanced, you'll have a problem. When the bare copper wire is in contact with the paperclip, there will be an electric current in the loop and also a magnetic field. So you just need another magnet to interact with the loop.
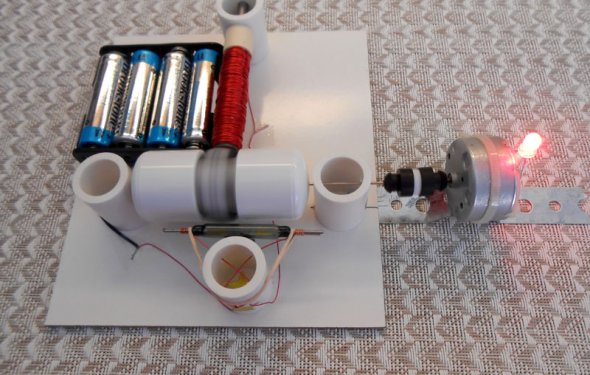
Just about any magnet will work—try finding one of those ceramic magnets that show up everywhere. Better yet, a nice neodymium magnet would work well (you can take apart an old hard drive to find one). Now hold the magnet over the top of the loop and give the loop a slight spin. Hopefully it will continue to spin. If it doesn't, try flipping the magnet around and rebalancing the arms on the loop. With some practice, you should get it to work.
Here's what it will look like:
Just Try It
I've helped lots of students and in-service teachers build simple demos. I like demos that you can build with ordinary materials so that you can see how everything works. But here's the problem—often people will get stuck unless they have* exactly* the same materials that I used. Don't worry about it. Try making do with what you have. Experiment with different wires. This is how you learn. Don't be afraid. Trust me—you might fail several times, but once you get it working, it will be awesome.