Build your DIY Sauna kit
 If we can be of more help, please email us or call us at 1.800.426.3929 or read on. Thanks!
- Nails and nail gun, aircompressor
- Fiberglass Insulation and Foil barrier
- Electrical wiring, gas pipe, or a wood pile (for heat)
- Ground fault electrical outlet
- Light switch (optional)
- Tongue and groove cedar paneling boards. Buy a home sauna kit (view common sizes: 4x6, 5x7, 6x8) or buy your own lumber
- Cedar bench lumber
MAIN STEPS TO CONVERTING YOUR ROOM INTO A SAUNA
Prior to building your sauna room, scan our planning your sauna and the sauna venting and framing article.
This article assumes you've removed any drywall and are now down to bare studs in the room, and bare joists on the ceiling, and a non-permeable floor. Tile, cement, vinyl are suitable non-permeable floors. Plywood will work, but it's good to at least put some tile under your sauna heater. Or anywhere water may accumulate. If you must go with plywood, definitely overlay with duckboard flooring.
How to Build a Sauna: Wiring for Light
 Wire your room for a light, light switch, sauna heater wire conduit, and perhaps controls outside the room. If preparing for a gas sauna heater, then you're using gas pipe and you'll have to consider the thickness of the pipe and how many other appliances share the gas line. Consult your gas professional.
How to Build a Sauna: Insulation to Lower Operating Costs
Insulate your walls with R-11 insulation for interior walls, and R-19 for exterior walls. Fiberglass insulation is available in either 16 inch or 24 inch wide rolls. Insulation lowers your operating costs by keeping your sauna heat in the sauna, so don't skip this step. And sauna insulation will also provide a sound barrier, so you relax more deeply which is what it is all about, as well as a good healthy sweat.
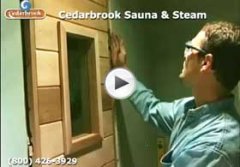
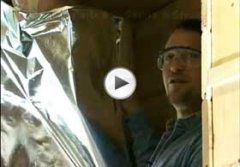
How to Build a Sauna: Foil to Reflect the Heat
The sauna foil vapor barrier adds a R-1 value to your insulation factor, and acts as a vapor barrier. Staple the foil vapor barrier to all interior surfaces, ie the wall and ceiling. Generally, we overlap the foil by 3 inches eliminating the need for the foil tape. Also don't substitute another product for the foil. The foil will never melt and is odorless.
A vapor barrier protects your walls from absorbing vapor. Some steam in a sauna room is great to help bring on a sweat, but it creates humidity that should be isolated from the rest of your house (or spa).
 You want that steam to exit through the vent, some is absorbed by the cedar and will dry out eventually. Of course, leaving your heater on longer will dry your sauna interior more quickly. Some sauna bathers keep their sauna heater on longer for this reason.
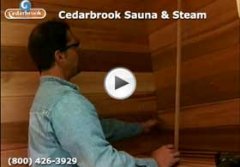
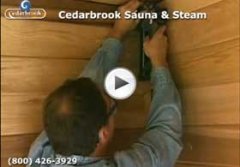
How to Build a Sauna: Cedar Paneling
Begin on one side of your ceiling and nail your cedar panel boards perpendicular to the joists. Move across the ceiling until covered. As needed, cut a hole around the light box. Best if your light and switch are wet-rated.
Next, nail the clear cedar paneling boards over the insulation and foil barrier. Nail your first row of tongue and groove wall boards to your studs horizontally, tongue up, groove down. Start from the bottom and move up. Generally, you only need nail the tongue after fitting it snugly over the prior row. This way the nail is hidden by the groove covering it. Vertical paneling is possible, but requires either plywood sheeting over the studs or some strategically spaced horizontal studs over the vertical studs.
Add your cedar panel boards in rows, checking for level every 4th board or so. Fit the grooves over the tongues and continue up the wall. Along the way, you may need to cut for electrical junction boxes for lights, switches, etc. That's the beauty of cedar, it's soft to work with and cuts easily. Continue installing your panel boards until your insulated walls are covered. At the last row butting the ceiling, remember you need not be perfect. If you're within a quarter inch you're fine. The trim pieces will cover any gaps.
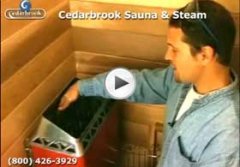
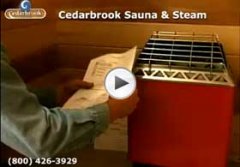
How to Build a Sauna: Centering the Sauna Heater on the Wall
We are mounting a Polar HMR 60 in our sauna video. The heater comes with 4 screws to secure it to the wall 2 long and 2 short. Always use the longer screws at the top. They have more tension on them and will secure the sauna heater to the wall.